|
|
 05-01-2017, 01:59 PM
|
#1 |
|
Member
Join Date: Nov 2014
Location: Luverne MN.
Posts: 97
|
Luverne Kawasaki Lowering Links
I want to provide an update on our lowering links and answer a few common questions. It seems as time goes by and the lowering link threads start making there way to the back pages, a lot of the same questions start coming back up. And as always if anyone has any questions they can always feel free to contact us direct. After rolling these out several years ago we have reached almost 100% positive reaction from our customers and a ZERO failure rate. When we initially built the first sets, the number one goal was zero failures and we've achieved this. I've always said, this is the cheapest and best way to retain your high quality factory shocks while lowering the seat height. I would welcome comments on this thread from some of the hundreds of guys and girls who've installed these links.
1, Can I simply remove the spacer in the shock itself? Please do not do this! eventually your shock WILL blow apart and you'll be forced to replace some very expensive shocks. Do not make the mistake of believing because some individual is stupid lucky and has xxxxx miles with no problems that you'll be just as lucky. If you've already done it and they haven't blown out yet, get them back in ASAP. 2. Do you make a lowering link for a 1500 or 1600? Regrettably that is a completely different suspension and we do not have a link that will fit these bikes. 3. For a Vaquero do I need to do any other modification, cutting, welding? No, it is a simple bolt on installation. If you can remove your shocks, you can install them easily. 4. For a Nomad or Voyager do I need to do any other modification, cutting, welding? Yes, the front corner of the saddlebag supports must be moved rearward to clear your shocks when the suspension compresses. We provide complete instructions on where and how much to cut and reweld. Any welding shop will be able to handle this with zero difficulty. Simply remove your bag supports and take them in along with our instructions. 5. Can I do my own thing and rig up a bolt on saddlebag support? No, We looked into this and firmly believe for long term reliability this part should be welded. 6. Is the bag support a part of the frame? No, it is a removable support behind the saddlebag. It bolts on to the fender rail under the edge of the seat. Those are the main questions we seem to get repeatedly. I'll update this thread as I think of others. As stated earlier, please don't hesitate to call us direct. I'm not on this forum daily so I'd hate to have you waiting days or weeks for an answer. Thank you again to all the folks who are enjoying our lowering links today! Rick Luverne Kawasaki 507-283-1800 Login or Register to Remove Ads |

|
|
05-02-2017, 04:22 AM
|
#2 |
|
Join Date: May 2014
Posts: 8
|
I have had these "Luverne Kawasaki Lowering Links" on my Vaquero for 2 years. At this point and time, I have had zero issues with them.
The only draw back lowering your bike (at least with FP exhausts), you may scrap your pipes during sharper turns ;) . |
|
|
|
05-06-2017, 06:47 AM
|
#4 |
|
Advanced Member
Join Date: Apr 2014
Location: N.C.
Posts: 727
|
They lower about 1 in.
They are powder coated steel. No lube, it's a stationary mount that repositions your shock angle No zurk fitting needed Sent from my iPhone using Tapatalk
__________________
" If your like most people its not for you " VULCAN VAQUERO |
|
|
|
05-06-2017, 07:15 AM
|
#5 |

Join Date: May 2015
Location: DBQ Iowa
Posts: 1,807
|
Like Boon, have had the lowering link for two previous seasons. The ride is about an inch lower. Enough that my 5'8" bride and firmly plant her feet at a stop. Two up riding/load still seems finec(we have not bottomed out the suspension). Handling seems unaffected. As SkullBagger pointed out, the links are quality made, easy to install, zero maintenance.
Ride safe, Smokier
__________________
You only get one, so "Make it the best day ever!" 2014 Victory Cross County Tour Blue Fire Gloss (BFG) "Cruella" Brides Ride: 2012 Victory Crossroads in Sunset Red "Ruby" Previous Vulcans: '15 Vaquero, '12 Vaquero, '10 1700 Nomad, '04 1500 Classic, '01 1500 Classic, '88 Vulcan 750 VROC # 10967 | VBA # 3115 
Login or Register to Remove Ads |
|
|
|
05-06-2017, 07:47 PM
|
#6 | |
|
Member
Join Date: Feb 2015
Location: Texas, Hemphill
Posts: 75
|
Thanks.
Quote:
|
|
|
|
|
05-07-2017, 03:15 AM
|
#7 |
|
Join Date: May 2014
Posts: 8
|
I agree with Skullbagger and Smokier, the build quality is good, made out of steal + powder coated for protection.
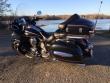
The lowering link shifts the bottom of your shock back about 1" back from the original mounting spot. The Pic I attached, the acorn nut is the location where the shock mounted originally and where the lowering link attaches now. The backside of the lowering link has a (as I can best describe as) cut in half solid rod about 3/4 - 1" welded to the lowering link plate that rests on top of the frame for support. As for the amount it will lower your bike, my bike was lowered by 5/8" (based off the measurements taken from ground to the lowest point of the muffler parallel with the rear axle). I lowered the front forks exact 5/8" as well to get full benefit (lowering links only lowers the back end of the bike ;) ) of installing the lowering links. Driveability/handling wise, not change. If it was not for the Freedom Performance pipes I have installed that are larger than the stock pipes, I most likely would not occasionally scrape my pipes. If you need to lower your bike, you really only have 2 options: - Lowering Links (Rick sells on ebay) - Or, install shorter shocks (last I looked, they were $400+ in costs) Either way, good product in my book. |
|
|
|
05-07-2017, 08:59 PM
|
#8 | |
|
Member
Join Date: Feb 2015
Location: Texas, Hemphill
Posts: 75
|
Thanks Boon. That was a great description. How did you lower the front? At 5/8" lowering, did it seem to help as far stability at a stop?
Quote:
|
|
|
|
|
05-09-2017, 02:44 AM
|
#9 |
|
Join Date: May 2014
Posts: 8
|
Sorry Glenn for the delay - I need to make a slight correction when using the terms of "lowering the front forks", I meant to say was I raised the front forks 5/8" so it lowers the front of the bike that amount.
As for the stability of the bike: Within 2 days of purchasing my bike a couple years back, I had lowered the bike, switched out the exhaust, switched out the air intake, installed Ray's throttle mod and installed a EJK fuel controller. So to answer your questions, I did not have a true comparison of a before and after handling, but seems to handle the way I would have expected it to. I personally took my bike to the local shop to complete the raising of the forks task. If you are interested in doing this yourself, the end goal is to have the forks raised 5/8” above the ‘fork holders’. There is not enough clearance between the Fork-Cover and the Lower Fork-Holder to just raise the forks right off the bat. There is a fork clamp (Spacer 92026-0133) that holds the Fork-Cover in place. Getting to this clamp is a task on its own as it is located under the Fork-Cover. Here are the steps to complete this task: Please Note: You will need a bike jack to make life a little easier. 1. You need to loosen & lower the forks within the fork holders. 2. You need to lower the forks just enough so you can slide the Fork-Covers up to expose the clamps in question. 3. Loose the clamps and drop/lower them exactly 5/8” 4. Tighten the clamps back up 5. Slide the Fork-Covers back down 6. Raise the forks in the Fork Holders until the Fork-Cover is touching the Lower Fork-Holder 7. Verify the forks raises 5/8” higher than the Upper Fork-Holder. 8. If all looks good, tighten up the forks in the both the lower and upper Fork-Holders. Here is a video of a person installing a 21” front wheel. At the 3:31 minutes mark into the video, you will see the fork clamp I am taking about that holds the Fork-Cover in place. FYI: You should not need to un-install the wheel to complete this task, but if there is not enough slack in the brake caliper lines, you may need to remove them to lower the forks enough to expose the Fork-Cover clamp. If all goes well, I am guessing it would take no more than couple of hours. Good luck.
Last edited by Boon; 05-09-2017 at 03:08 AM.
|
|
|
|
05-09-2017, 01:21 PM
|
#10 |
|
Member
Join Date: Nov 2014
Location: Luverne MN.
Posts: 97
|
The actual measurement it lowers the seat is exactly 3/4". The average 5'6" to 5'8" rider is on the balls of their feet without, and heels on the ground with the links. As stated, they're made from 1/4" steel plate that is powder coated and they require no maintenance whatsoever aside from an occasional bolt check that the entire bike should receive.
We recommend only dropping the front by raising the forks 1/2". We had one customer who dropped his 5/8" and slammed a pot hole (hard) and the brake junction lightly dented the top of his front fender. |
|
|
|
06-04-2017, 03:20 PM
|
#11 |
|
Member
Join Date: Mar 2010
Location: Van Buren, AR
Posts: 462
|
Other than Trust32, I think that I was one of the first to use these links. I still have no issues on my 2012 Vaquero and would recommend them to other Vaq riders. As a matter of fact, I often DO recommend them LOL
__________________
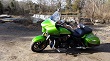
Heath Cady aka "Talon" VBA #01416 2012 Vaquero SE Candy-Lime Green/Black aka "T'Kehla" 2005 Nomad 1600 Black/Silver aka "Mystique" (SOLD) 2006 Vulcan Classic aka "Lil'Wolf" (SOLD)   "Life isn't a race; no one gets out alive. May as well slow down and enjoy the ride." "Life isn't a race; no one gets out alive. May as well slow down and enjoy the ride."
|
|
|


 Linear Mode
